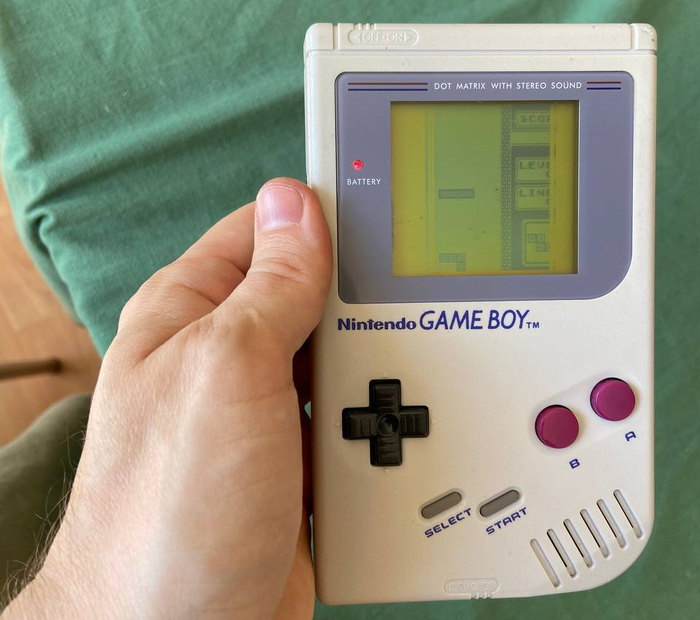
Original Gameboy from 1989. Fixing the Real Tetris
I was born in 1989, so I’ve always wanted to buy a Gameboy with the authentic Tetris by Alexey Pajitnov. Even before the Tetris movie came out, I read the history of Nintendo and thought about trying that original Tetris on its native console, rather than on a cheap Chinese knockoff from my childhood. And then I got the opportunity not only to buy it but also to open it up and fix it!
The absence of several vertical lines is a common problem for the Gameboy. On top of that the patient has issues turning on, loses power, makes noise through the speaker, and alternates between showing a good picture and vertical stripes on the screen. Additionally, some buttons, like Select, are hard to press, and some buttons get stuck.
I bought the Gameboy for 500 pesos (it originally cost 400, but I had to pay an extra 100 pesos for delivery as it was located far away), and it came without a back cover. I bought an original cover for 150 pesos and a Tetris cartridge for 100 pesos. So, the total pleasure cost 750 pesos or about 4,000 rubles. I should note that the peso is strong now, while the ruble is not, so Mexican prices don’t seem low.

The initial plan was to open it up, inspect it, clean off the dirt and corrosion, and check the connections of the ribbon cable for the speaker and screen. Before opening it up, I watched several YouTube videos to be ready to carefully disconnect the ribbons, as shown in the picture below.

I disconnected the ribbon and examined the halves of the device. There was a bit of corrosion and some dirt, which I cleaned with alcohol. What stands out is the missing screw. This means the Gameboy was opened before me. This is a bad sign, but I proceed anyway.

I removed both boards and cleaned everything with cotton swabs and discs soaked in alcohol. Sometimes I had to use tweezers to scrape off the rust and dried dirt, and then wipe it with alcohol.

During disassembly, I noticed that one wire connected to the voltage converter was partially frayed by a screw, which was screwed right next to the ribbon cable. Most likely, those who opened it before me didn’t notice the ribbon lying on the hole, and the screw partially crushed the wire during assembly. Fortunately, the wire is functional, but it would be better to replace it in the future. Also, the power switch is very rusty. I’ll see if I can buy it on AliExpress or find a donor on eBay at an affordable price.

I would also like to replace the battery contacts. I scraped and cleaned them, but the corrosion has eaten away at them significantly. These can definitely be ordered on AliExpress; it’s unlikely to find a donor from 1989 with contacts as good as new. Sometimes I have to rotate the batteries to get the device to turn on.

After cleaning, the device in its disassembled state looked like this:

Not perfect, but now the buttons don’t stick, and there are no visible traces of corrosion or dirt. But the main issue remains – stripes on the display. For this, I need to reassemble the device and heat the display contacts live.

I need to remove the adhesive tape with the seal from the ribbon and heat the ribbon while checking which columns disappear and reappear. To make it more visible, I turn the display contrast to the maximum. I solder at a temperature of 320-330 degrees. It’s hard to capture on camera, but I tried to show it a bit.
In the end, I managed to restore all the columns. For the first time, it’s an excellent result! In the comments on my Nintendo DS Lite repair posts (I have a whole series of posts on this, check them out if you haven’t), people correctly pointed out that heating is not a proper repair. If a contact is weak, it may fail again if the Gameboy is shaken or dropped. If there are issues in the future, I might completely replace the screen. But I’m keeping this device for myself, so a temporary solution is fine for now.
Did you notice there was no sound in the video? First, I resoldered the speaker just in case, but it didn’t help. The speaker responded with noise to the battery, so it should be working. I had previously noticed that the board with the jack connector was either not original or poorly soldered. Two of the four wires had weak contacts.

I resoldered all the wires, tested them, and now the contact is reliable. The photos show that the jack itself is in poor condition. I decided to check its pinout to understand if it works correctly. I first turned on the Gameboy and plugged in headphones – there was sound. I removed the headphones – no sound. I found out online that the jack has two contacts responsible for breaking the circuit when headphones are plugged in so that the signal doesn’t go to the speaker. I tested the contacts; the switch is dead or stuck in an open state. Since I don’t plan to use the Gameboy with headphones, I decided to solder a jumper so the speaker always works. I’ll order a new jack and replace it when possible.

It’s time to assemble the device. Here’s what we have:
- The display will likely continue to act up, but it works for now.
- The battery contacts need to be replaced.
- The power switch needs to be replaced.
- The audio jack needs to be replaced.
But for now, I can enjoy playing Tetris!

